
Do you have a plant that is in need of some pruning? If that is the case, the following are some useful techniques that will assist your plant in growing new branches. Utilizing wire and string is one approach to achieving this goal. First, you should knot the wire around the branch, and then, for a better grip, you should bind it with string or twist ties.
This can create new growth at the end of your branch, which can be chopped off if not wanted. Another option would be to use something like a potato peeler, place it on edge and slice away until you see healthy white tissue form at the bottom of your cuts.
You should also make certain that there is sufficient space for air circulation by ensuring that no leaves are covering one other. If there is an excessive amount of overlap, this could lead to rotting because there is insufficient airflow.
Because you want your houseplant to produce additional branches, you give it the best care possible. However, time doesn’t produce the branches you had been waiting for, leaving you somewhat unhappy. Did you do something wrong? What causes the branches on houseplants to start growing? In order to provide you with the solution, we conducted a great deal of research. This article will help you make a decision about tree stumping and removal. Here at Tree Amigo, we’re passionate about trees!
How can one encourage a plant to produce additional branches? You will want to trim or prune your houseplant in the following manner in order to stimulate the growth of new branches on the plant:
- Make sure you're using the appropriate tool for the job (such as garden scissors or pruning shears)
- Begin by removing all of the non-living components.
- First, prune the longer branches, and then chop down any extremely lengthy stems.
- Alternately, you could squeeze the stems (only for some houseplant species)
- Fertilise afterwards
In this extensive guide, we will take you through the aforementioned procedures and explain everything in much greater detail. In addition, we will explain why pinching the stems of some houseplants is effective, as well as which cutting tools are ideal for your indoor plant. Keep reading!
Why Pruning Works For Plant Growth
If you want to increase the number of branches that you have, it can seem contradictory to get rid of the ones that you already have, right? Therefore, how can one generate additional branches by pruning existing ones?
You see, the reason for this is that you are not randomly cutting the branches off the tree. Instead, you will start with the major shot at this point. This portion of your indoor plant has thrived the greatest in terms of development, nearly to the disadvantage of the other branches.
A hormone known as auxin is produced by houseplants, as you may recall from one of our more recent blog posts on this topic. This begins at the top of the plant, where there is the greatest concentration of auxin, and moves downward. As the level drops, the amounts of auxin that are present get progressively reduced. This is done on purpose. Auxin's role in the plant is to stimulate growth, but because smaller buds receive a lower concentration of it, they don't advance in size as much. This maintains the primary stem's status as the primary stem.
According to an article published by Science Daily in 2009, if the main stem already possesses an adequate amount of auxin, the plant will not transfer any to the shoot tip. Because of this, every single shoot tip now has an equal opportunity to mature into a large and robust plant. Even though none of the branches shine brighter than the primary tip, more branches continue to sprout.
Pruning For More Branches: Follow These Steps!
Well, now that you have a better understanding of why it is beneficial to prune the branches of your houseplant, let's talk about how exactly you should go about doing so. It is time to return to the steps we stated in the introduction and proceed carefully through each of these.
Step 1: Use The Right Cutting Tool
First things first, you need to give serious consideration to whatever cutting tool(s) you will use. Although some people who grow plants inside may be able to get away with trimming their plants using kitchen scissors, we do not recommend that you follow their example. Because there are so many excellent plant pruning equipment currently available, there is no reason to do so.
You can safely overlook the majority of the heavy-duty ones, such as tree pruners or loppers, as long as your houseplant has not reached a rich, full, or thick state. You should replace it with one of the following options instead.
Garden Scissors
Let's begin with the tool that has the least amount of moving parts, which are gardening shears. The functionality of these scissors is very similar to that of other pairs of shears that you may have used in the past, thus they may remind you of kitchen shears.
Because of their oversized handles, which are typically made of colourful plastic, garden shears are very simple to grip and hold onto while you are cutting. The blade is somewhat short but quite sharp.
It is recommended that you grab for your gardening scissors when you are removing delicate blooms and stems, but other than that, you should not need gardening shears. They are not suited for anything other than jobs that are rather straightforward and light in nature.
There are longer varieties of garden scissors available if you need to reach further inside your plant without upsetting other flowers or branches, but these are still intended for the fundamental cutting tasks that you need to perform.
Long-Reach Pruners
When we talk about extending our reach, the following tool is designed specifically for that same goal. These cutting tools, which are often known as long-reach pruners, typically include handles that may telescope, allowing the user to precisely adjust the angle at which they are cutting.
When you use pruners with a lengthy reach, not only will you prevent yourself from going too far into your plant, but you also won't scratch yourself. In addition, there are certain pruners with short handles that may be operated with a single hand, whereas others with longer handles require the use of both hands to operate well.
Secateurs
The word "secateurs" is only a fancier way of referring to a regular pair of shears that are used for pruning. Each pair of secateurs has its own unique set of blades; they are not interchangeable. You have the option of purchasing an anvil blade or a bypass blade.
When using an anvil shear, the top and bottom blades are both flattened on one side of the instrument. Because of this, you won't have to worry about the stem sticking to the secateurs, making them an excellent choice for cutting woody stems, which may be fairly tough.
There are no flat edges on the bypass blade, making it appear more like a pair of scissors. Instead than closing on top of one another, the blades overlap one another as they move closer together. These are the pruners you want to use if you have to clip a stem that is particularly delicate.
You can find both right-handed and left-handed secateurs at stores, allowing you to always cut with the hand that is most natural to you. In addition, secateurs are available in a variety of sizes, allowing users to perform a wide range of cuts.
You are required to make sure that the garden scissors, long-reach pruners, secateurs, or any combination of the three that you use have been properly sterilised. After that, to clean the shears, you may either submerge them in a bath of ethanol or isopropyl alcohol (with a concentration of between 70 and 100 percent) or soak a wipe in one of those solutions. If you want to proceed in this manner, be sure to give the blades a thorough cleaning on the inside in addition to the outside.
Step 2: Remove Dead Parts
Now that you are armed with your secateurs, you are prepared to start the pruning process. The question then arises, where on your houseplant should you make your cuts?
You need to take a few steps back and examine your houseplant in great detail before you even consider making a single cut on it. You are examining the state of health of every branch, stem, bloom, and growth, looking for anything that is either already dead or about to pass away. Your houseplant will not benefit from the removal of its dead tips and branches. They are a barrier to development, so the removal of these obstacles should be your first order of business.
As you get closer to these dead pieces, tilt the cutting shears so that they are at a 45-degree angle. Depending on the amount of dead vegetation that needs to be cut away, you can complete this task using either regular secateurs or even gardening scissors.
Just the dead ends of the branch should be taken off rather than the entire branch. Examine the spots that appear brown or even black, as well as those that feel dry, sag, and have a limp appearance. Those are not what you are looking for, but the sections that are still green and healthy should be preserved. Only in the event that the entire thing has perished would you consider cutting off an entire branch. Even yet, the primary stem should be left where it is because it has the potential to produce more branches.
Remember not to ignore your flowers, as they, too, are susceptible to perish. If the flowers on your plant are in bad health, it will be much easier to see than if the branches are, because the blossoms will lose their colour and brightness. They will also lose their firmness and turn brown.
When removing any dead flowers, start at the flower's head and make a clean, decisive cut all the way down to the base of the flower with your garden scissors. In the same way that dead branches prevent the growth of new, healthy branches, dead flowers prevent the growth of new, healthy blossoms. However, if you cut out the dead sections of your houseplant, it should start producing flowers once more very soon.
Step 3: Start With Your Longer Branches And Then Go Shorter
You have now removed the diseased and dead branches, right? So far, so good. The next thing you need to do is take a few more steps back and examine the form that your houseplant has overall. This is not like pruning trees, where you have to worry about martini shapes and other similar details. Planning for a tree lopping, pruning, wood chipping, mulching, palm removing & stump grinding? At Tree Amigos, you can find high quality and affordable arborist services for your needs. Instead, you should determine which of the branches have become unnecessarily lengthy so that you can cut them back to their proper length before continuing.
Put away your garden shears and pick up some secateurs or long-reach pruners; you won't need them for this phase of the work. Your objective is to prune the branches so that they are approximately one third shorter than they were before you started.
Once more, you should not try to rush through this process. Do not simply use a measuring tape to determine where on the branch you should cut it and then perform the entire trimming in one fell swoop.
Instead, you should take it piece by piece and cut it multiple times until you reach the desired length. Make sure that you maintain a 45-degree angle with each cut you make during the entire process.
As you move forwards, you should constantly be on the lookout for nodules. These buds that are growing might not appear to be very significant to an indoor gardener who is not experienced, but they are actually very significant.
They are buds that will open or blossom in time, but they are not quite ready yet because they are still immature. Therefore, make every effort not to spook them while you are pruning. Additionally, before moving on to the next step, ensure that your pruning shears have been properly sterilised.
Step 4: Now, Move On To Long Stems
If You understand correctly, you cut back all of the long branches that were on your houseplant. At this stage, the plant has developed to the point where it looks very excellent, and you are quite pleased of it.
However, don't get too comfortable just yet because you still have a lot of work ahead of you. Next, you will want to prune your indoor plant so that its profile has a more pleasing shape. Remove any stems that may be getting in the way of this.
Once the lengthier branches have been cut, it ought to not be too difficult to locate these extended stems. Now, keep in mind that not all longer stems necessarily stand up straight when viewed from the side. In the end, though, they are merely stems and not branches. In addition, the stems may droop or hang, so inspect the base of your houseplant to see if there are any stems that have fallen off.
When you are certain that you have located all of the stems, you may use either your secateurs or your garden scissors to remove the larger stems from your houseplant. When you are making your trim, just as you should do with everything else, you want to employ that 45-degree angle. In addition to this, you should cut off around one third of the whole length of the stem.
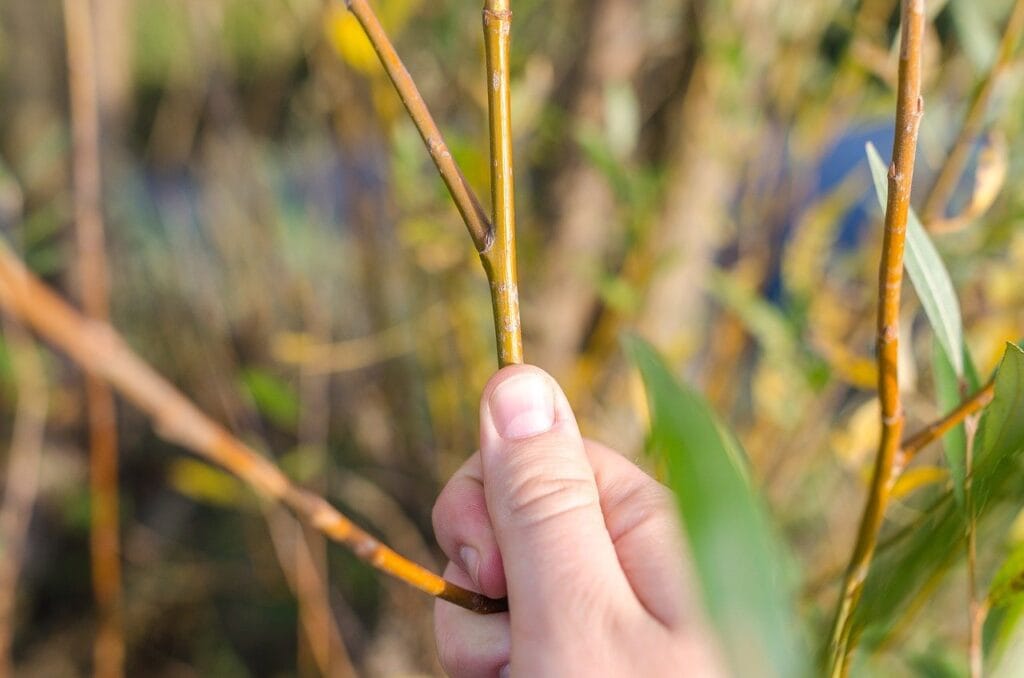
Step 5: Pinch Stems
Following the four steps outlined above should result in your houseplant appearing more healthy and well-kept than it ever has before. Because they will have less surplus growth and no dead portions, the branches that you prune will have more room to expand as a result of your work. It is now up to you to ensure that your houseplant receives the proper care so that new growth can appear on the branches and the plant can continue to expand.
The following procedure, which involves pinching the stems of specific indoor plant species, is something you can do. A few examples of these are the heartleaf philodendron, the English ivy, and the coleus. These are all houseplants that have been covered in previous posts on my blog; therefore, if you are cultivating any of these wonderful plants, you should review those older posts to refresh your memory.
You can certainly prune these three houseplants in the conventional manner, which is covered in greater detail throughout the rest of this article. However, you also have another option, which is a significantly superior one, and that is to pinch the stems. Because the stems of these indoor plants are more pliable than those of many other species of houseplants, this works quite well.
Pinch pruning, also known as stem pinching, is a form of plant maintenance that stimulates new growth. In point of fact, by pinching the stems of the houseplant, you may be able to increase the total number of stems the plant has. If there are any stems that are missing as a result of them having died, pinching the area can cause a new stem to sprout in the place where the previous one was.
Pinch pruning, often referred to as stem pinching, is a method of plant maintenance that encourages new growth. Pinch pruning is also sometimes called stem pinching. In point of fact, by pinching the stems of the houseplant, you may be able to increase the total number of stems the plant has. If there are any stems that are missing as a result of them having died, pinching the area can induce a new stem to grow in the spot where the previous one was. This can be done in the event that there are any stems that are missing.
When pinching, you could use your fingers, but you could instead try using pruning shears instead. To be able to pinch the leaves without cutting off the stems with your shears would require a high level of dexterity and precision on your part.
Reach for the portion of the stem that is immediately above the leaf node, either with your fingers or the shears. You may recall from earlier sections of this manual that the node of your houseplant is the location where new growth will emerge in the future. It is possible that you will stifle this growth if you interfere with it too much. Therefore, you should never touch the node; instead, focus on the stem.
Pinch each of the stems of your indoor plant that needs to grow as you go through the process. When you are finished, continue to care for your plant, and before long you should start to notice new branches!
Step 6: Fertilize When You’re Finished
Getting back to pruning the traditional approach, let’s pretend you just wrapped up with the job. What kind of care should you give your houseplant at this time? You need to fertilise it as soon as possible, preferably on the same day. An all-purpose, soluble fertiliser is the ideal selection unless you have a houseplant that demands a different kind of fertilisers. If such is the case, you should defer to that.
How Often Should You Prune Houseplants?
You may find that trimming the houseplant wasn't as challenging as you had anticipated once you got started. You are aware that the moment will come for you to do it once more, but the question is: how much time should pass?
It is dependent on the type of pruning that you are performing. If all you want to do is cut back a few overgrown branches or stems, you may do it whenever you like and regardless of the season.
However, if you need to do more heavy-duty pruning, many indoor gardeners recommend planning your pruning for when your houseplant’s growing season begins. This time of year is considered spring or summer by many houseplants.
Certain plants, particularly those that do not produce blooms, do not mind having their branches pruned during the winter. If your houseplant does produce some blossoms and these have yet to bloom, hold off on grabbing the shears. When the lovely flowers begin to bloom, you will know it is time to prune as required.
How Much Cutting Should You Do On Average?
Like with many things with your houseplant, it’s possible to over-prune it. Anytime you prune, whether you’re performing minor trimming or more work than that, you want to cut no more than 20 percent of the plant’s foliage. You could even want to limit your pruning to simply 10 percent.
This might not sound like a lot, but less is absolutely more in the case of your houseplant. Should you find you did under-prune, you can wait a couple of weeks and then come back to your plant and prune it again.
A houseplant that’s severely trimmed may have lost its nodes, so any future growth is going to take quite a long to show. So now you’re stuck with a mostly naked-looking plant for the next weeks, maybe even months.
Frequently Asked Questions About Growing Plants
All plants, whether annuals, perennials, or even trees, go through the same essential stages of growth. First, a seed must germinate or begin to grow. This process is triggered by factors such as moisture and warmth, resulting in the seedling breaking through the soil. Once the seedling has emerged, it will begin to develop leaves and roots.
The leaves are responsible for photosynthesis or converting sunlight into energy the plant can use to grow. The roots anchor the plant in place and absorb water and nutrients from the soil. As the plant continues to grow, it will develop stems and branches, and eventually flowers and fruits.
It is important to understand these growth stages to care for plants properly. By providing them with the right conditions at each stage, gardeners can ensure that their plants will thrive.
In decision trees, pruning is essential because it helps to minimise overfitting, which can lead to inaccurate results. When a model is overfitting, it has been adjusted to the training data too precisely; as a result, the model does not generalise very well when applied to new data.
This may result in an inadequate performance on the test data. Through trimming and shaping the tree, pruning helps prevent overfitting by making the tree more manageable and efficient. Consequently, pruned trees have a lower risk of overfitting the data and a higher chance of carrying out admirably with new data. Therefore, pruning is necessary to construct decision trees that may generalise well.
While there is no surefire way to make plants grow faster, gardeners can take a few steps to encourage healthy and speedy plant growth. One of the most important things is to ensure that plants get enough sunlight.
In general, most plants need at least six hours of direct sunlight each day. If possible, try to provide plants with a little extra light by setting them near a south-facing window or using grow lights. Additionally, it is important to keep plants well-watered.
Once the soil around a plant begins to dry out, growth will slow down. Finally, fertilising can also help to encourage plant growth. Choose a fertiliser formulated for the type of plants you are trying to grow, and follow the instructions on the package for the best results. Following these tips can help your plants reach their full potential.
When it comes to growing plants, there are a lot of factors to consider, from the type of soil to the amount of sunlight. Another important factor is the colour of light. Different colours of light have different effects on plant growth. For example, blue light promotes leaf growth, while red light is ideal for blooming and fruiting.
While both blue and red light is necessary for healthy plant growth, research has shown that a mix of the two is often most effective. This is because blue and red light complement each other, helping plants grow strong and healthy. As a result, when choosing a grow light for your plants, it is often best to choose one that emits both red and blue light.
Tree pruning removes dead, diseased, or damaged branches from a tree. It can also direct the tree's growth, promote fruit production, or improve the tree's appearance. Tree pruning is usually done with hand-held tools, such as shears or saws.
However, power tools like Chainsaws can be used for larger branches. The most important thing to remember when pruning a tree is to make sure that the cut is made at the correct location. Otherwise, you could end up causing more damage than good. It is always best to consult with a professional arborist when in doubt.
Tips For Pruning Your Houseplants
Always Cut Off Less Than You Need
If you've ever cut your own hair, then trimming the branches on your houseplants will feel very familiar to you. The same is true of a plant; if you remove too much of its foliage, you won't be able to regrow it. Because of this, the best strategy is to just make very minor cuts. In the event that further pruning is required, it is always an option; nevertheless, major cuts could remove too much. If you cut off a whole branch, there is no way to put it back together again.
Remember, You Can Always Propagate Healthy Branches
When you prune your houseplant for the first few times, it is natural that you would worry that you will do too much of it. It is healthy to have some of that dread, since it will cause you to be more careful than if you did not have any fear at all and just went crazy with the scissors.
That doesn't mean mistakes won't happen. It's not necessarily the end of the world if you accidently cut off a complete and healthy branch while you weren't intending to do so. This can happen. When it comes to propagating new plant life, you can always make use of the branch, stem, or another portion of the plant.
Follow Those 45-Degree Angle Cuts
You should make all of your cuts at a 45-degree angle, as instructed throughout the entirety of this course. This isn't just random number or anything like that. There’s actually a very solid reason for chopping into your plant at this angle.
A 45-degree cut is like a diagonal. There’s a longer end of the stem or branch and now a shorter end as well. In comparison to creating a straight cut, you end up with a larger surface area. Even more essential is that this position permits the houseplant to take in more water. Yes, it’s still very vital that your clipped plant gets water, else, it’ll begin dying.
Keep Those Pruning Shears Clean
This is another thing we keep touching on during this guide: to sanitise your pruning shears. Plant illnesses can spread from one region of the houseplant to another if you use the same unclean shears over the entire plant. Also, sterilising ensures the shears are clear of debris or sap so they won’t get stuck when you’re trying to make a key cut. See our list of available arborist services Perth for your tree removal solutions.
It’s not enough to rinse your shears with water alone, as water won’t free the shears of the bacteria that may have latched on and can subsequently spread diseases to your healthy houseplants.
How To Fix An Over-Pruned Tree Or Shrub
While some plants need a bigger prune than others, in general, the golden rule is to trim no more than 15 to 20 percent of a tree’s canopy at one time. Remember that point for the next time we meet.
Let’s focus on the now. Make use of this step-by-step advice in order to repair the damage done to your plant by previous excessive pruning.
- Know what you’ve got. It matters what type of plant you have! Some shrubs can be chopped to the ground and will come back as if nothing occurred. Others that are cut too much may start to languish or die.
- Be patient. If the tree's branches were not severely damaged or infected with a disease, then they should have the ability to spur new development in the tree. But, you probably won’t see fresh flowers in the first or even the second, year following a significant over-pruning.
- Get an expert’s opinion. An ISA Certified Arborist® has the expertise to let you know if your tree will likely bounce back (or not) (or not).
- Provide an extra boost with proper plant health care. Your tree’s straining without its branches, so help it out a bit. When it is dry, give it some water (and right before winter). Next, continue to mulch it so that additional nutrients can be added to the soil. Check to determine if your tree needs to be fertilised before you finish.
- Assist the plant in taking shape. Once new growth comes in, a pruning method called thinning will help balance out the canopy and maintain the tree’s main branches robust.
- Be careful not to repeat the same error repeatedly. If you cut your tree way too much, it will take a very long time for it to recover and look as nice as it did before! Therefore, the next time you are thinking of hiring someone to trim your trees, make sure you ask them these questions beforehand.